During the planning phase, the multimedia connections were planned in such a way that cabling can be exchanged in a flexible way. In Step 5, the locations of the wall-mounted switch boxes were recorded. Therefore, the corresponding holes could be created in the rear wall of the low Billy bookcases middle part after connecting all bookcases with each other with a hole saw. Lucky – the holes were reasonably accurate. Only the wall distance must be bridged with plaster compensation rings, but this was clear because the entire library construction is not applied directly to the wall.


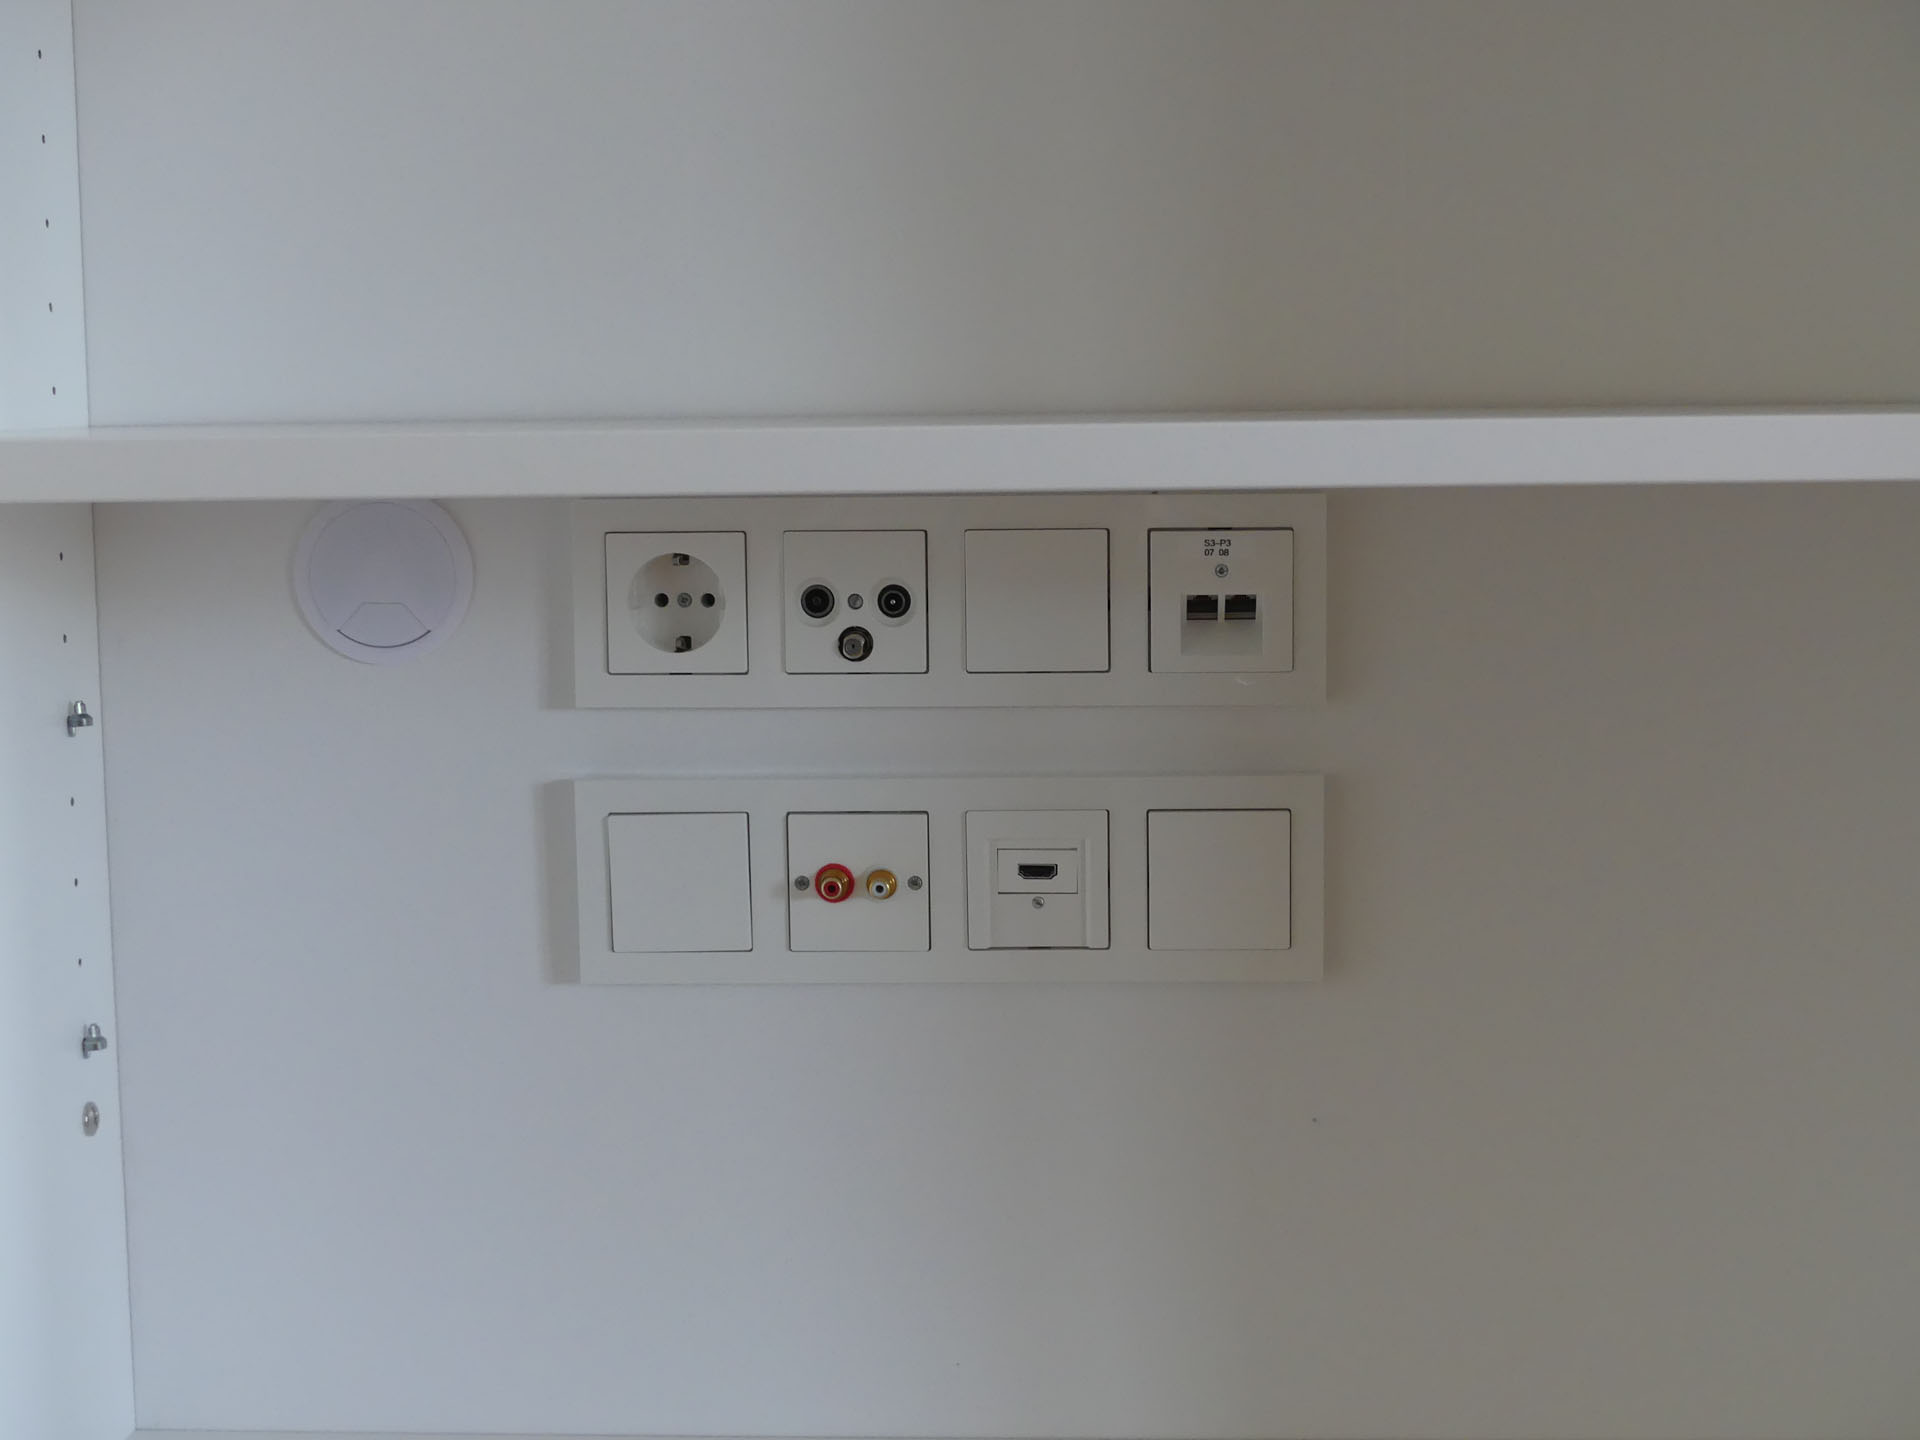
At the top of the picture you can see different device boxes. For example, a standard electric socket, an antenna socket, universal connection / network junction box Cat6A (Rutenbeck), socket for audio, HDMI junction box (Rutenbeck), several blind covers for the unused empty boxes. To the right of the boxes there is a currently unused cable outlet which corresponds to the always usable cable outlet, which seen at the creation of the back wall. The plan is actually that the unlighted low Billy bookcase in the middle houses an audio system. The lower row of device boxes in the pictures above has a connection via conduits to another corner of the room in which, if necessary, a computer can control audio and video content. Each junction box of the lower row thus has a corresponding junction box elsewhere. Even now, audio and video content can be transferred / displayed through a direct connection. However, it is also possible to install an ordinary TV set at any time and to connect it via the cable outlet boxes to the corresponding sockets (satellite, network, …). Many options standing open. At the moment I prefer a beamer solution that I have to finalize. Currently I´m using a small portable Mini-Beamer that is really easy and fast to setup. On the long run a beamer and a ceiling mount will be installed. Since I watch televesion very rarely (I don´t actually watch televison, I watch only on demand but still very little) it is for me the best solution.
The picture below shows the screen size when using a beamer (lights of the Billys dimmed in cinema mode). Here a diagonal of 67.8 inches (172.1 cm) is available. The image width is then almost exactly 59 inch.


The picture above shows the control panel in an opposite corner of the room, from which audio and video data are transmitted. Of course, the small desk also serves as a welcome reading place for offline and online literature. 🙂